- Home
-
Services
Software Consulting
Innovative, future-proof software solutions

Software Consulting, Outsourcing & Training
Innovative, future-proof software solutions

Assessments
Innovative, future-proof Assessments solutions
Getting startedAI
Cloud Consulting
Innovative, future-proof Cloud Consulting solutions

Industry Types
Innovative, future-proof Industry types

Products & Offerings
Innovative, future-proof Products & Offerings
- Resources
- Our Networks
- About Peritos
- Contact us


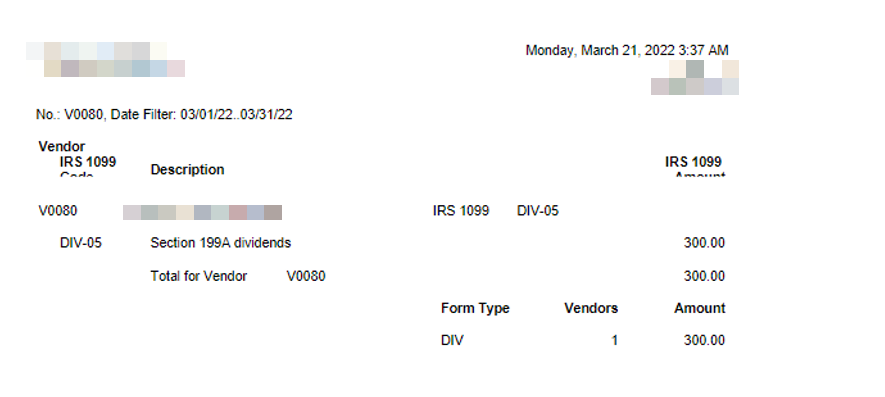
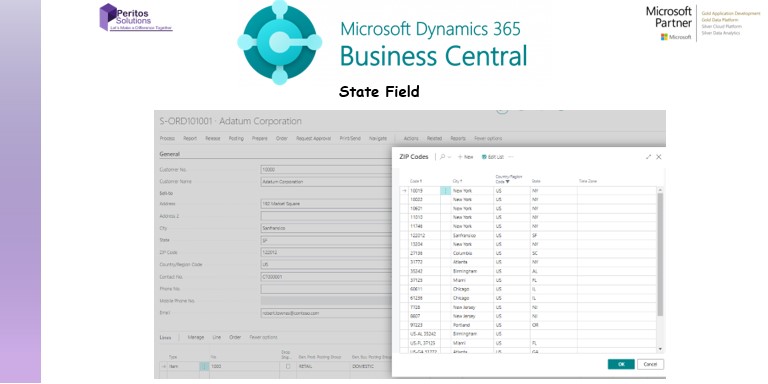
 Once you are done correcting the transactions, you can run the “Vendor 1099 Information” report to verify the totals.
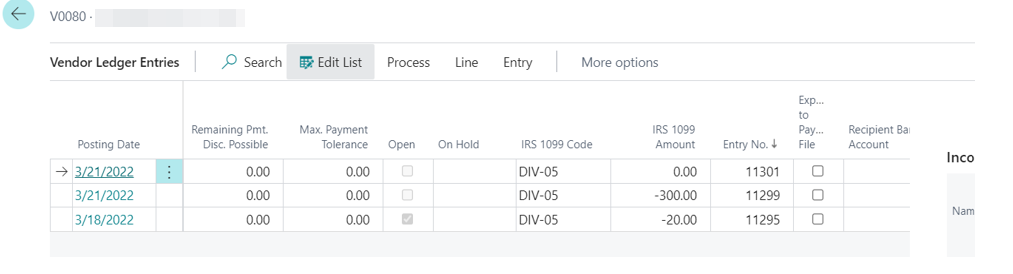