The blog provides you an insight into Why Microsoft Business...
Read MoreDynamics 365 is highly customizable, so you can use its online tools to modify or create fields, entities, business processes, and more. Usually, you’ll do your customization work on a sandbox environment, test them, and then transfer the final customizations to your production environments when they’re ready.
The Customization can be transferred in 3 Steps.
1. Sign in to the environment where you have done customizations (source Env).
2. Open the Settings menu ![]() at the top of the page and select Advanced Settings. The advanced-settings area then opens in a new browser tab. Note that this area uses a horizontal navigator at the top of the page instead of a side navigator.
at the top of the page and select Advanced Settings. The advanced-settings area then opens in a new browser tab. Note that this area uses a horizontal navigator at the top of the page instead of a side navigator.
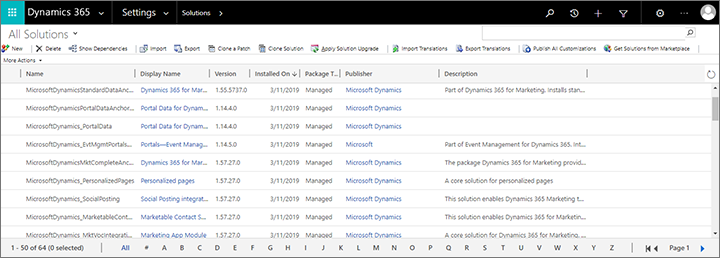
3. Navigate to Settings > Customization > Solutions. A list of existing solutions opens.

4. Select New on the command bar to create a new solution.
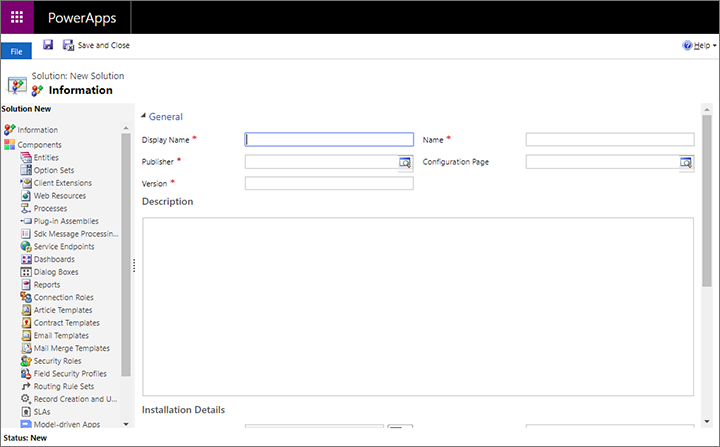
5. A new Power Apps window opens. Provide a Display Name, Name, Publisher, and Version and then select Save on the command bar to save your solution.
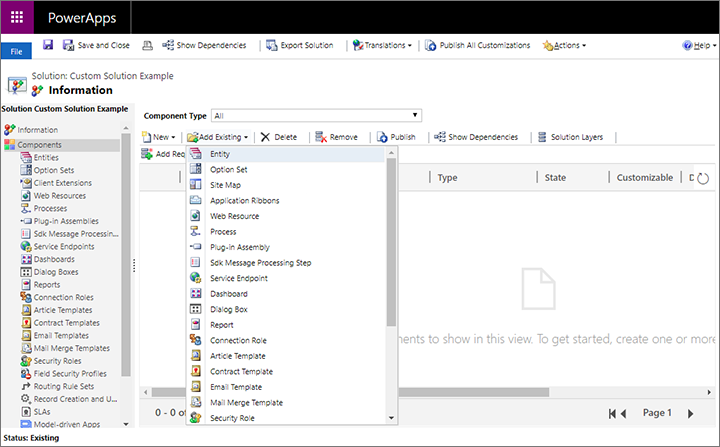
6. To copy an existing entity and then customize it, open the Add Existing drop-down list and select Entity.
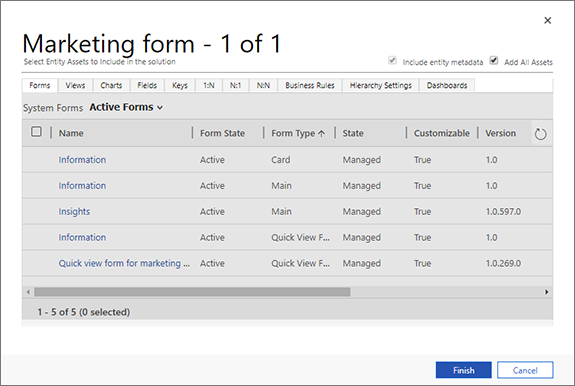
7. A dialog opens, showing all the available entities. Here you can add any number of entities to your new solution. As an example, just select the Marketing form check box and then select OK to add it to your solution.

8. You’re now asked to choose which aspects of the selected entity you’d like to include. In this case, we want to include everything related to marketing forms, so select the Add all assets check box and then select Finish.
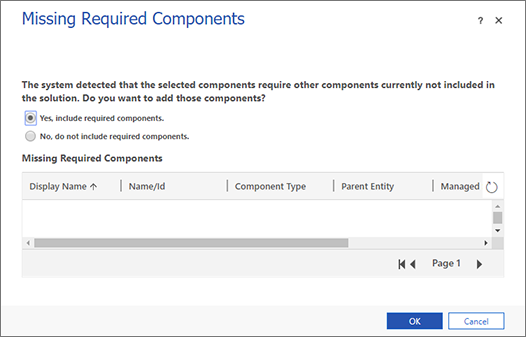
9. If your selected entity requires additional components, then you’ll be asked whether to include them. Select Yes to include required components and then select OK.
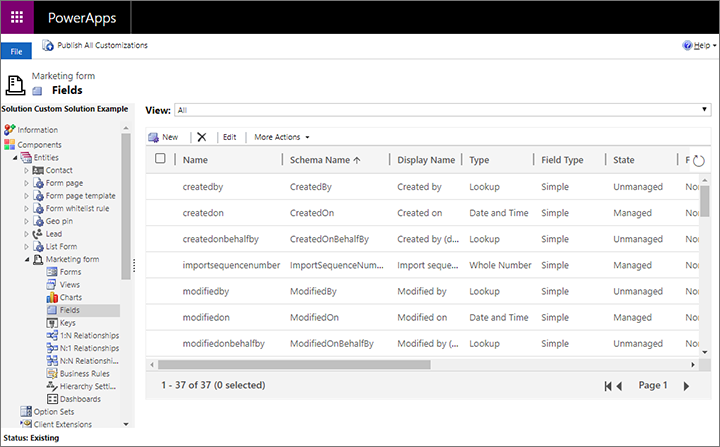
10. You now return to your new solution, which includes all the entities and related components that you selected to include. In side panel, expand Entities to see the ones you added, and then expand the Marketing Form entity to select Fields.
11. For this example, we’ll customize the Marketing form entity by adding a new field. Select New to create a field and enter a Display Name. Leave the other settings at the default values (we’ll allow this to be a text field).
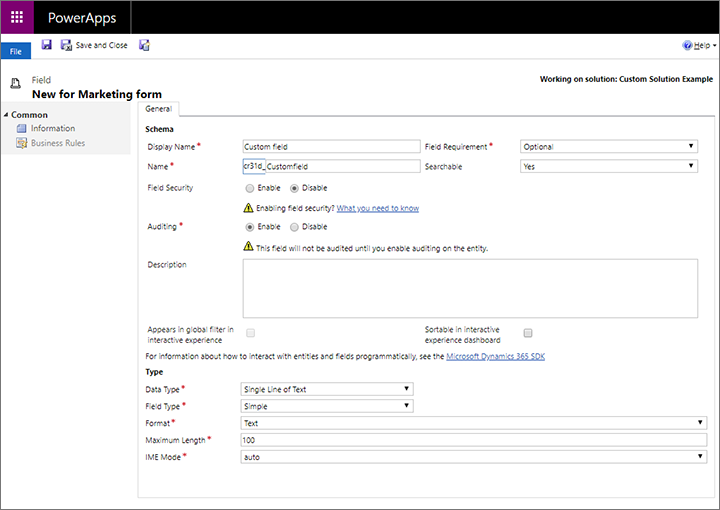
12. When you’re done changing all the required settings, select Save and close on the command bar.
13. You now return to the Power Apps window where you’re setting up the new solution. Select Publish All Customizations to make your new field available to the app.
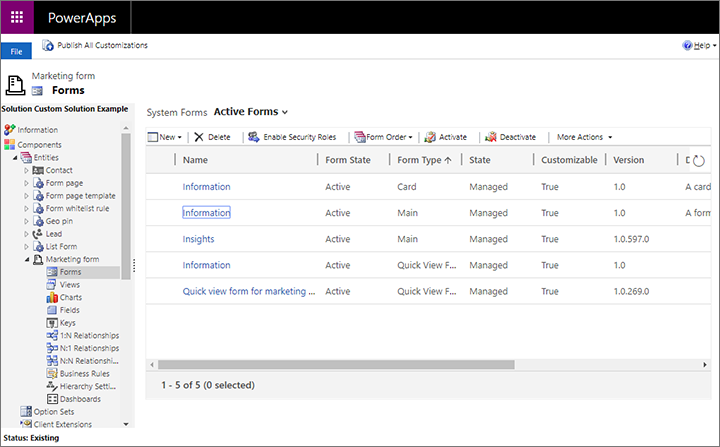
14. In the side panel of the Power Apps window, go to Components > Entities > Marketing form > Forms. We need to add our new custom field to a form to make it visible to users in the app.
15. Open the from named Information with a Form type of Main by selecting its name. This is the form that users see when they create or open a marketing-form record.
16. A new Power Apps window opens showing your selected form setup. In the central pane of this window, scroll down to the Summary section. Then drag your new custom field from the Field Explorer panel to the General Information section under the Summary.
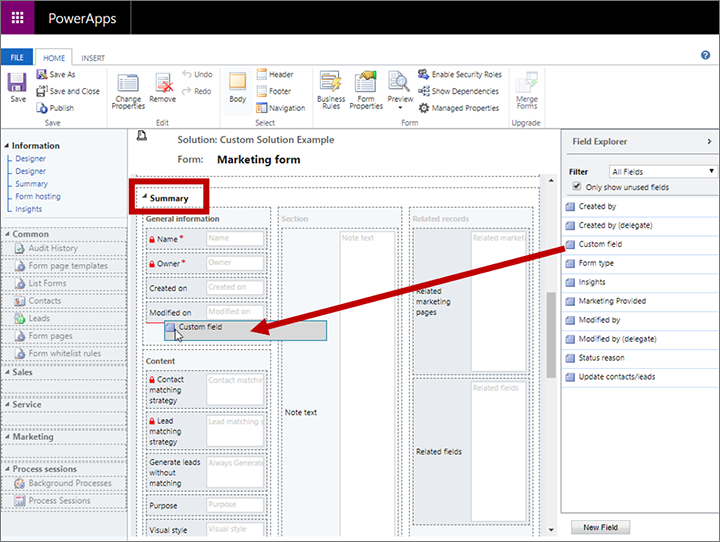
17. Select Save and close on the ribbon.
18. You now return to the Power Apps window where you’re setting up the new solution. Select Publish All Customizations to make your customized form available to the app.
19. When publishing is complete, close the Power Apps window.
If you’d like to confirm your
changes, you can go to the Marketing app, open a marketing form record and look
for your new field on the Summary tab.
When you’re done customizing your solution and are ready to move it to another environment, you can start with the export custom solution. Here’s how:

3. Select the check box for the solution you want to export, and then select Export on the command bar.
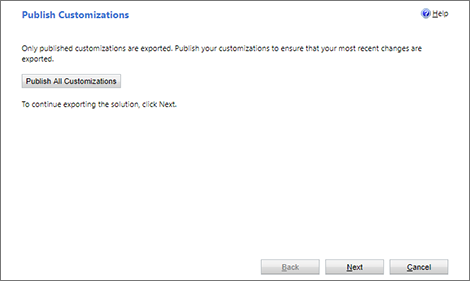
4. The system now reminds you that only published changes will be exported. If you followed the procedure in the previous section, then you should already have published everything, but if you’re not sure, you can publish now. When you’re ready to continue, select Next.
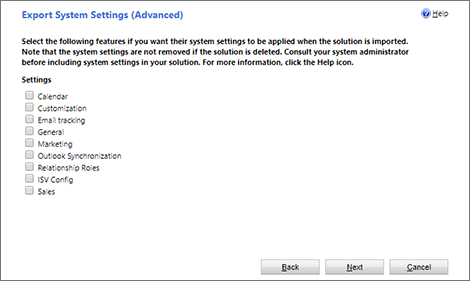
5. You can now choose to include various system settings in the export. System settings will be applied permanently on the destination environment, and will remain there even if you later remove the solution. Normally, you shouldn’t include any system settings, and if you are just doing this procedure as an exercise, then don’t select any of these check boxes now. Select Next to continue.
6. Select Managed and then select Export.
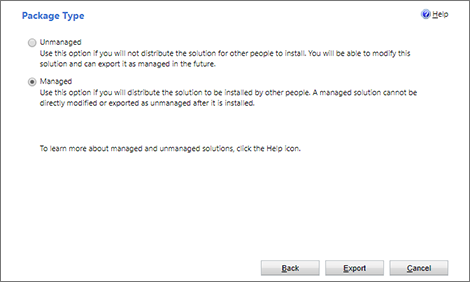
7. The solution now downloads as a zip file named after the solution.
After exporting the custom solution from the source environment, you’re ready to import the solution to the destination environment, which will add its customizations to that environment and also make it easy for you to remove them again, if needed (though any imported system settings will remain as it is, if you chose to include them in your exported solution).
To import a solution:
4. Select Import on the command bar for the dialog to launch.
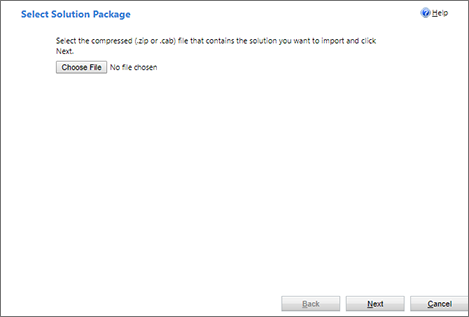
5. Select Choose file to open a file browser. Find and select the solution file that you exported from the source environment.
6. Select Next to continue.
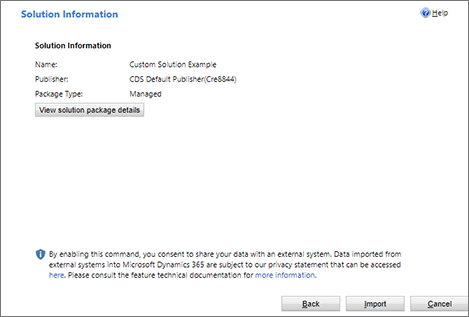
7. Select Import to begin importing the desired solution. A progress bar opens in a pop-up window which closes automatically when the import is done. Then, the import dialog updates to show the result.
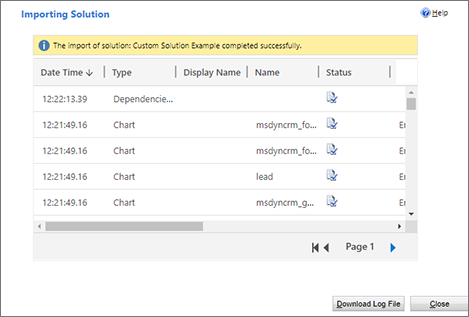
8. Select Close to close the import dialog.
9. To confirm the import, go to the Marketing app, open a marketing form record and look for the new customized field on the Summary tab.
It is very easy to move customizations with the help of Dynamics 365. If you have never moved customizations before, do not worry. Just follow this step by step guide thoroughly to get the desired results. Take an example and try the entire strategy once to understand the three methods thoroughly.
References
https://docs.microsoft.com/en-us/dynamics365/marketing/transfer-solution
The blog provides you an insight into Why Microsoft Business...
Read More